Adding reservations details into calendar events makes life easy on both the customer and Resource associated with each reservation. The Resource doesn’t have to double-check the Dashboard or automated email/text message and the customer can easily reschedule or cancel if a conflict arises. Passing this important information is as easy as adding a few variables in the Marketplace Settings.
STEP 1: Connect a Calendar to the Associated Resource
The only way to pass reservation details to a calendar event is by having a calendar connected to the Resource associated with the booking. Use this article to learn how to connect your Google or Outlook calendar to a Resource.
Reference this article to learn how to associate a Resource with a Bookable.
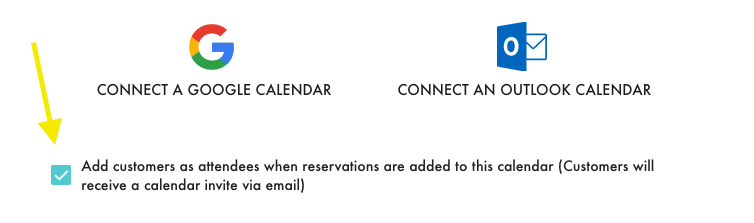
In order for a customer to receive a calendar invitation with the form questions and responses added to the calendar description, you must first ensure this box is checked.
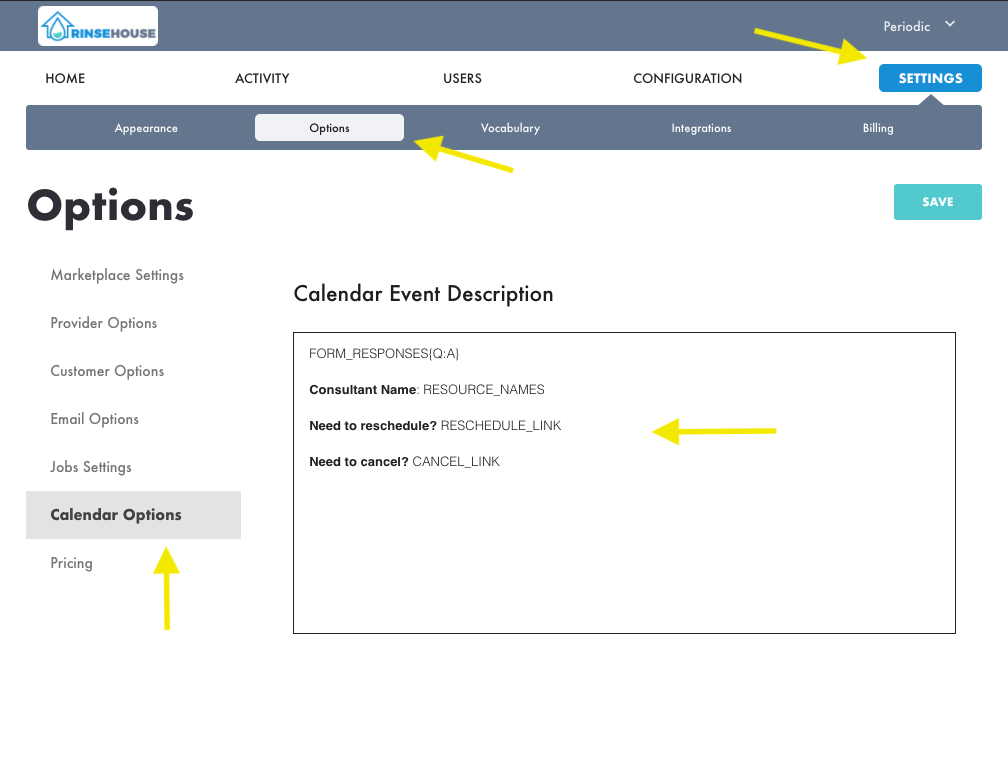
STEP 2: Update the Calendar Options in the Marketplace Settings
Change the default description by adding or removing variables in the Calendar Options setting. Whatever you add here will populate on calendar events across every Provider, so make sure the variables and messaging is general enough to account for reservations made on every Bookable and Provider.
Use our article on Message Variables to target the data you need.
STEP 3: Watch as Reservation Details Populate the Calendar Descriptions
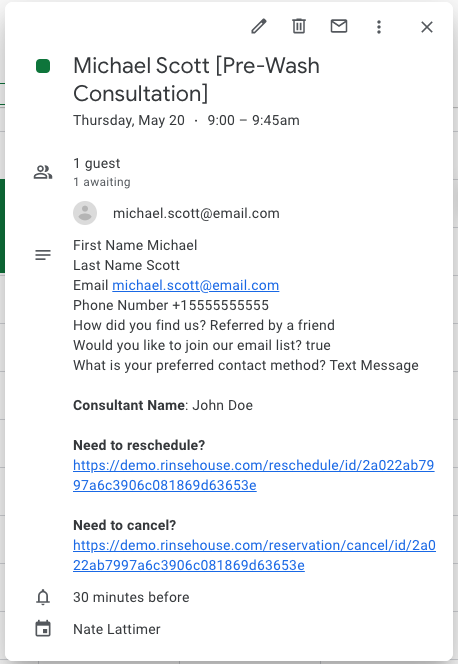
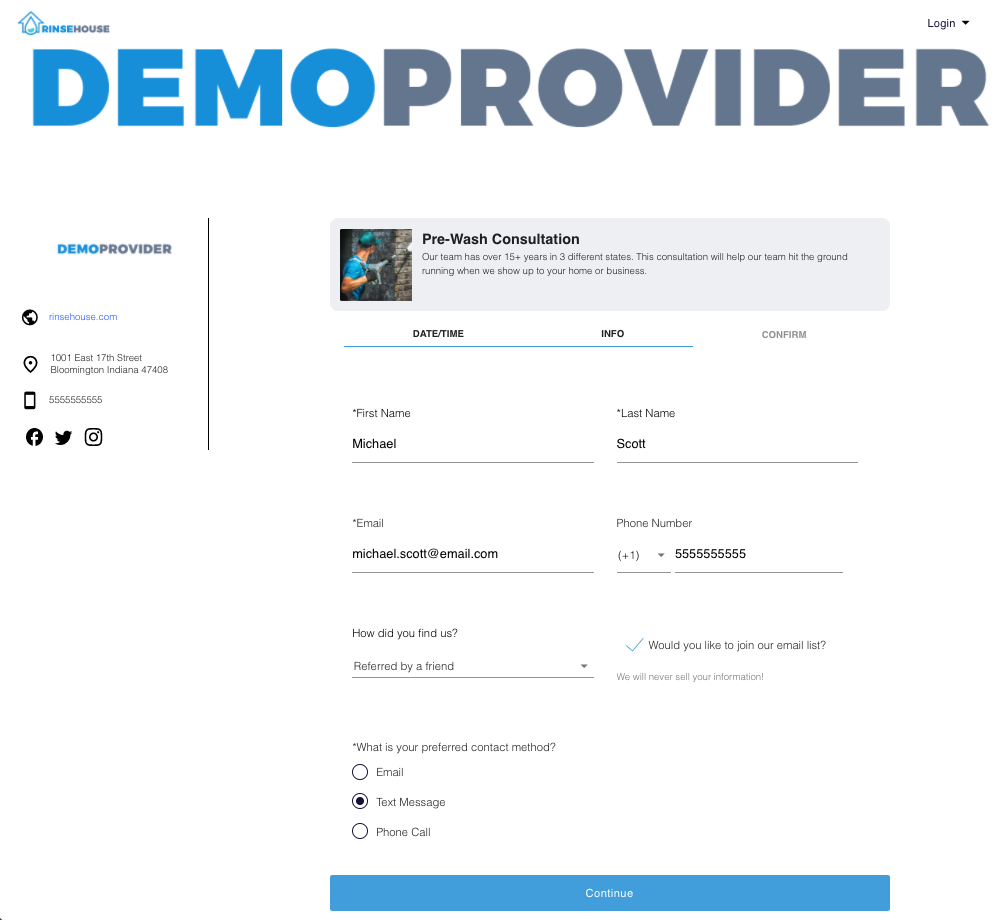
Form responses filled out by customer booking.
The calendar event showing up on both the customer and Resource Users connected calendars.